For many, printers are these mysterious black boxes that churn out documents seemingly at will. But when a printer decides to malfunction, frustration sets in. Before you toss your printer and head to the store, consider taking a peek inside. With a little know-how and the right tools, you might be surprised at what you can fix yourself.
This comprehensive guide delves into the inner workings of a printer, providing a step-by-step approach to disassembling and fixing common printer problems.
Important Safety Precautions Before We Begin
- Unplug the printer: Always ensure the printer is unplugged from the power source before disassembly.
- Prepare your workspace: Find a clean, well-lit area with ample space to lay out printer parts.
- Gather your tools: You’ll likely need a basic toolkit with screwdrivers (various sizes), pliers, and possibly tweezers.
- Take pictures: As you disassemble the printer, take pictures at each step to aid in reassembly later.
Understanding Your Printer
Printers, despite their varying functionalities, share some common components:
- Toner Cartridge (Laser Printers) or Ink Cartridges (Inkjet Printers): These hold the toner or ink used for printing.
- Printhead: This component transfers the toner or ink onto the paper.
- Fuser Unit: This unit heats and bonds the toner or ink to the paper.
- Paper Tray and Pickup Roller: These components feed the paper into the printer.
- Waste Toner Container (Laser Printers): This captures excess toner powder.
Common Printer Problems and Potential Fixes
Here’s a breakdown of common printer issues and how to troubleshoot them through disassembly and cleaning:
- Print Quality Issues (Streaks, Fading, Smudging):
- Cleaning the Printhead: Most printers have a built-in cleaning function. Consult your user manual for specific instructions. If that doesn’t work, you might need to access the printhead for a more thorough cleaning with a lint-free cloth and rubbing alcohol (consult your manual for specific cleaning instructions for your printer model).
- Paper Jams:
- Locate the Jam: Paper jams typically occur in the paper tray, fuser unit, or around the printhead. Carefully remove any jammed paper, making sure no scraps remain.
- Toner Cartridge/Ink Cartridge Issues (Low Toner/Ink, Leaking):
- Replace the Cartridge: If your toner or ink is low, replace it with a compatible cartridge. For leaks, consult your user manual for cleaning instructions or consider replacing the cartridge.
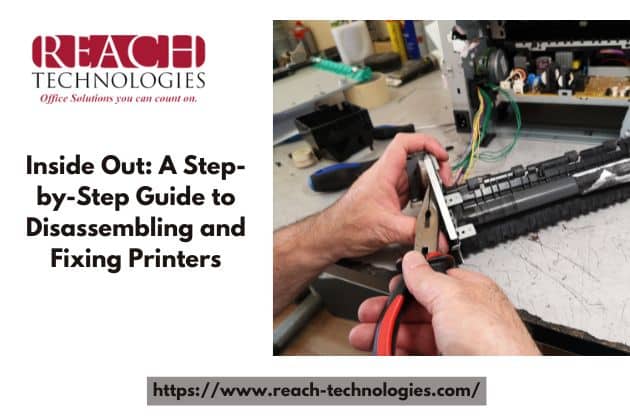
Disassembly – A Step-by-Step Approach
Disclaimer: The following steps are a general guideline. Refer to your printer’s service manual for specific disassembly instructions for your model. Disassembly procedures can vary depending on the make and model of your printer.
- Power Off and Unplug: Double-check that the printer is unplugged from the power source.
- Remove Consumables: Take out the toner cartridge (laser printers) or ink cartridges (inkjet printers) and any remaining paper from the tray.
- External Case: Most printers have screws on the back or bottom that secure the outer casing. Locate and remove these screws carefully. Some models might have clips or latches instead of screws.
- Internal Components: Once the outer casing is removed, you’ll see the internal components. Depending on the model, there might be additional components secured by screws or ribbon cables. Note the placement of these for reassembly.
Important Note: At this stage, avoid touching any delicate components like wires or the fuser unit (which can be hot). Focus on the areas you suspect might be causing the problem, like the paper tray or printhead compartment.
Cleaning and Fixing
Once you’ve identified the potential culprit, proceed with cleaning the specific component following the recommendations mentioned earlier for each issue. If the problem seems more complex, consult a professional repair service or your user manual for troubleshooting steps.
Reassembly
Carefully reassemble the printer in the reverse order of disassembly. Double-check that all screws are secure and any cables are properly reconnected.
Testing and Troubleshooting
Once reassembled, plug the printer back in and power it on. Run a test print to see if the problem has been resolved. If the issue persists, consult your user manual for further troubleshooting steps or consider seeking professional help.
Conclusion: The Rewards of DIY Printer Repair
Disassembling and fixing a printer isn’t for everyone. It requires patience, a little technical aptitude, and the right tools. However, for those willing to take on the challenge, the rewards can be significant:
- Cost Savings: Repairing a printer yourself can be significantly cheaper than replacing it or calling a professional repair service.
- Sense of Accomplishment: Successfully fixing your printer can be a rewarding experience, fostering a sense of self-reliance and accomplishment.
- Extended Printer Life: By addressing minor issues proactively, you can extend the lifespan of your printer and avoid unnecessary replacements.
Resources for the Aspiring Printer Repair Guru
If you’re interested in venturing into the world of DIY printer repair, here are some helpful resources:
- Manufacturer Manuals: Your printer’s user manual is a valuable resource. It often contains troubleshooting guides and disassembly diagrams specific to your model.
- Online Repair Guides: Numerous websites offer detailed repair guides for various printer models. Search for your specific model and “DIY repair guide.”
- Printer Repair Forums: Online forums can be a treasure trove of information and support. Connect with other printer enthusiasts and get advice for troubleshooting specific problems.
A Final Word: Safety First!
Always prioritize safety when working with electronic equipment. If you’re unsure about any step in the disassembly process, consult a professional or refer to a reliable resource.
By following these steps and prioritizing safety, you can embark on a rewarding journey of understanding your printer and potentially fixing common problems yourself. Remember, even a small fix can save you money and extend the life of your valuable printing companion. Happy tinkering!